Aluminium retaining profile for slats, UT shape, 50 mm wide, anthracite RAL 7016, smooth
NEW| Product availability: | In stock | We normally dispatch goods within 24 hours. |
|---|


in stock
€74.98 including VAT
| Length [m] | Weight |
|---|---|
| 6m +/- 5mm | 3,66 kg |
in stock
€37.50 including VAT
| Length [m] | Weight |
|---|---|
| 3m +/- 5mm | 1,83 kg |
in stock
€24.99 including VAT
| Length [m] | Weight |
|---|---|
| 2m +/- 5mm | 1,22 kg |
Description of Aluminium retaining profile for slats, UT shape, 50 mm wide, anthracite RAL 7016, smooth
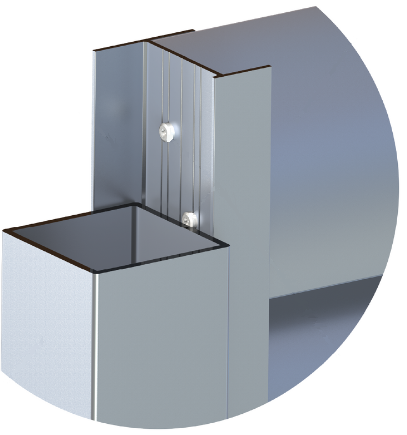
Aluminium mounting profile for fence slats has a UT shape, with an anthracite RAL 7016 finish and a smooth surface, making it suitable for installation in front of the posts on a gate, fence, or other opening. The profile's external width is 50 mm, the projection is 44 mm and the length is 2 m, 3 m, or 6 m.
- Mounting profile compatibility
- Installation method for parallelogram-shaped slats
- Installation method for louvre slats
- Installation method for teardrop-shaped slats
- Finish
- Technical specifications
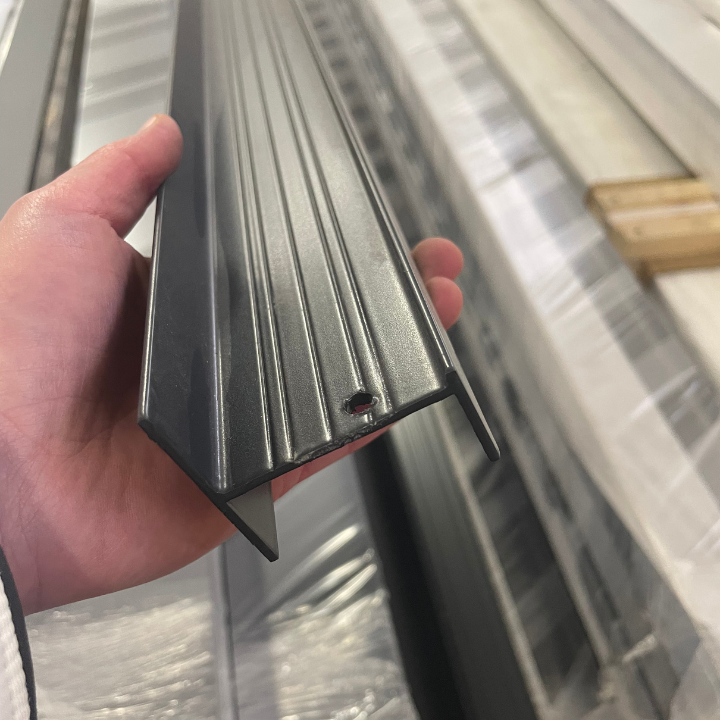
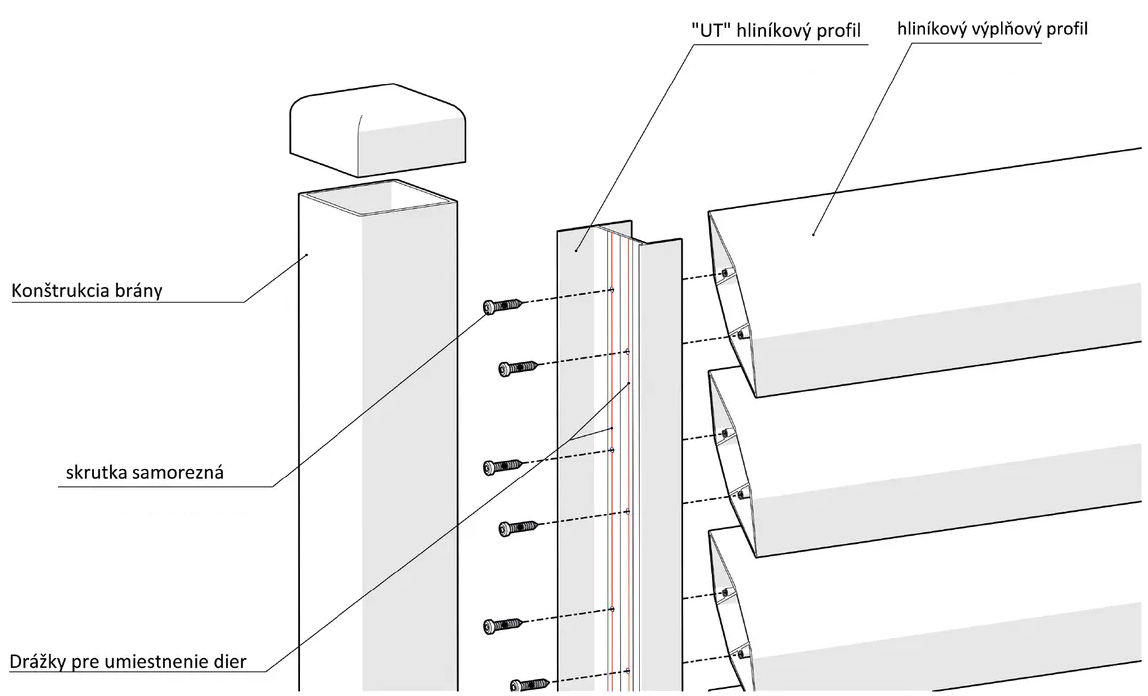
On the outside of the profile, there are 5 pre-drilled grooves for accurately positioning the screws horizontally. The ideal screws are stainless steel self-tapping screws DIN 7981 with a pan head, 3.5 x 19 mm.
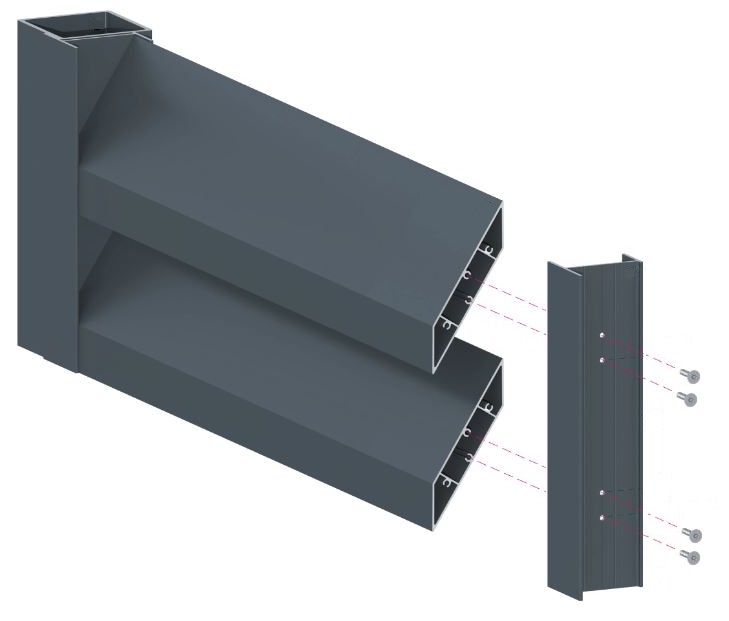
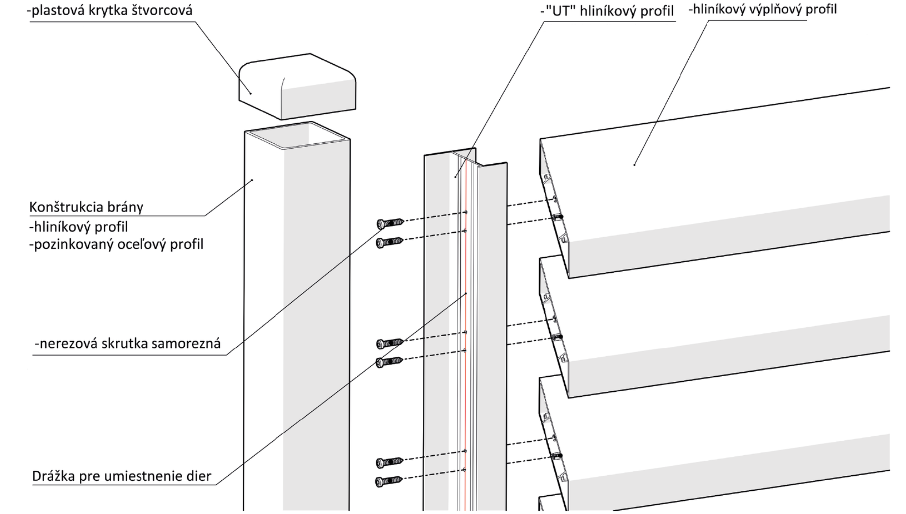
The advantage of the UT profile is that the gate infill can be installed without welding: the protruding T-section of the profile can be screwed to a post or the structural frame.
Mounting profile compatibility:
The profile is suitable for installing the following slat models at an angle:
- aluminium parallelogram-shaped slat
- aluminium louvre slat (with a wall thickness of either 1.6 or 2 mm)
- teardrop-shaped slat
Compatible models:
- anthracite aluminium parallelogram-shaped slat with a smooth finish, (i.e. the same finish as the mounting profile)
- anthracite aluminium parallelogram-shaped slat with a textured finish
- aluminium louvre slat with a wall thickness of 1.6 mm, unfinished
- aluminium louvre slat with a wall thickness of 2 mm, unfinished
- unfinished teardrop-shaped aluminium slat
- unfinished Z-shaped aluminium slat
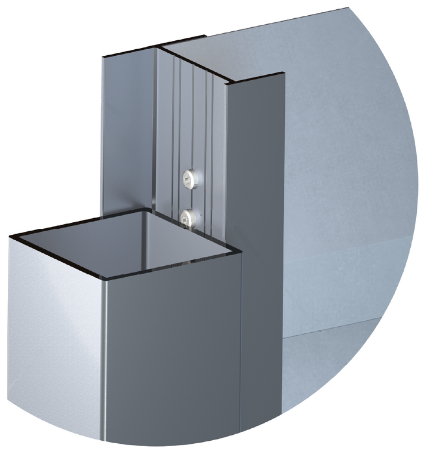
Photo of the UT mounting profile:
How to install an aluminium parallelogram-shaped slat:
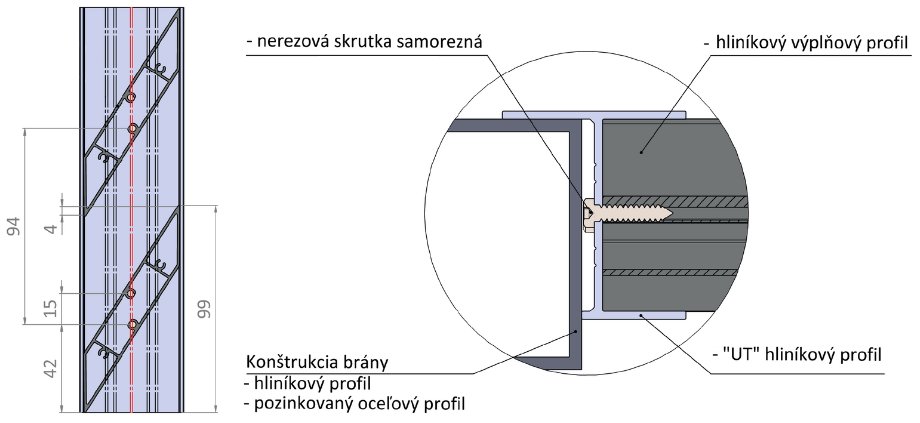
The UT mounting profile has 5 pre-drilled grooves. When installing a parallelogram-shaped slat at an angle, holes are drilled in the central groove for the screws. Inside the hollow slat, guide grooves on the sides hold the screw in place. When the slats are installed at an angle, these guide grooves ensure that every slat has the same inclination, creating a regular pattern. Simply measure the spacing between the slats on the mounting profile to create the pattern you want—open or closed. With the slat positioned at an angle, the distance between its two inner guide grooves is 15 mm. The recommended distance from the bottom when positioning the first slat is 42 mm. The slat is 99 mm high when installed at an angle.
Anthracite parallelogram-shaped fence slat with a smooth finish paired with a U-shaped mounting profile in the same colour and finish, creates a coordinated, modern look for your fences, gates, and pedestrian gates.
 |
 |
 |
 |
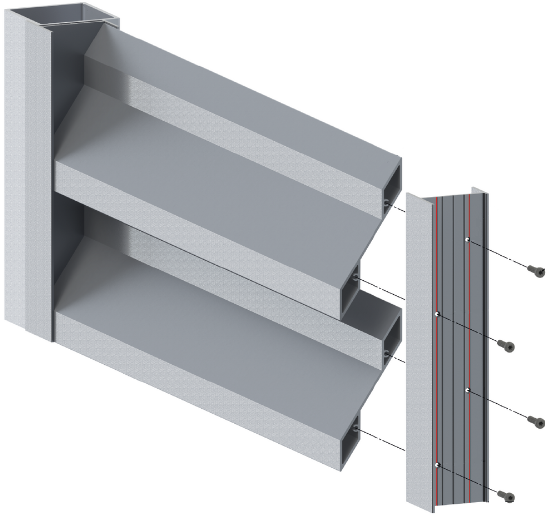
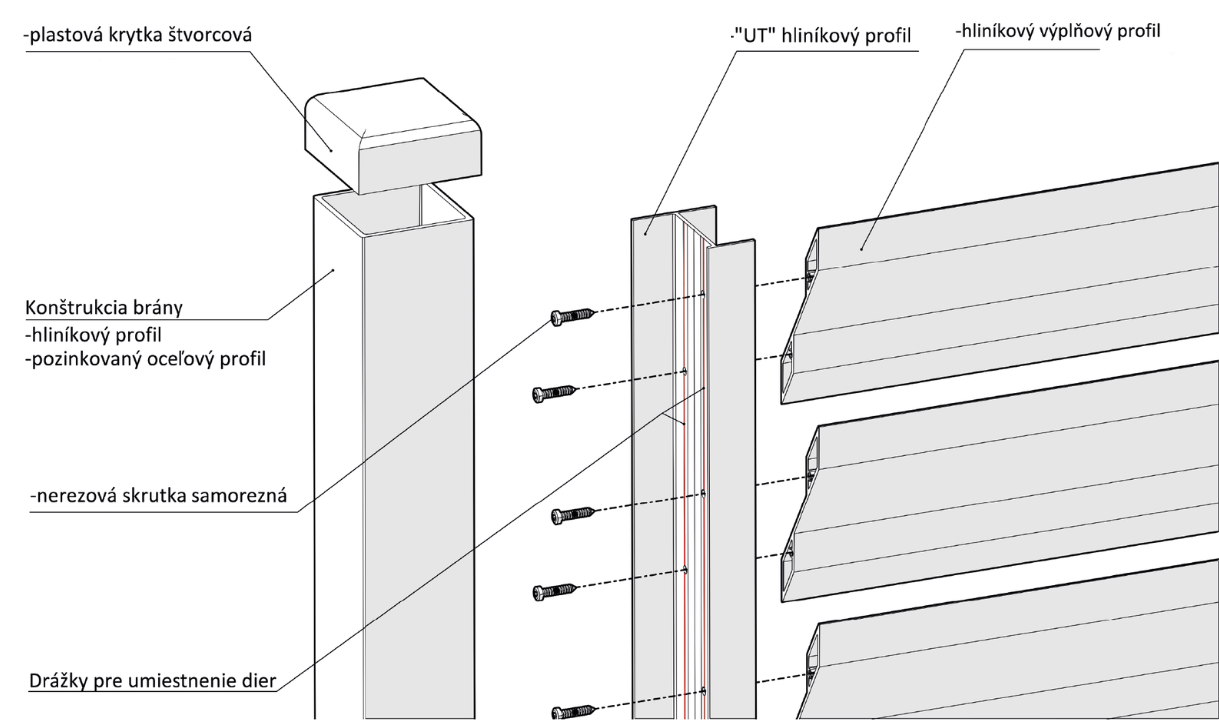
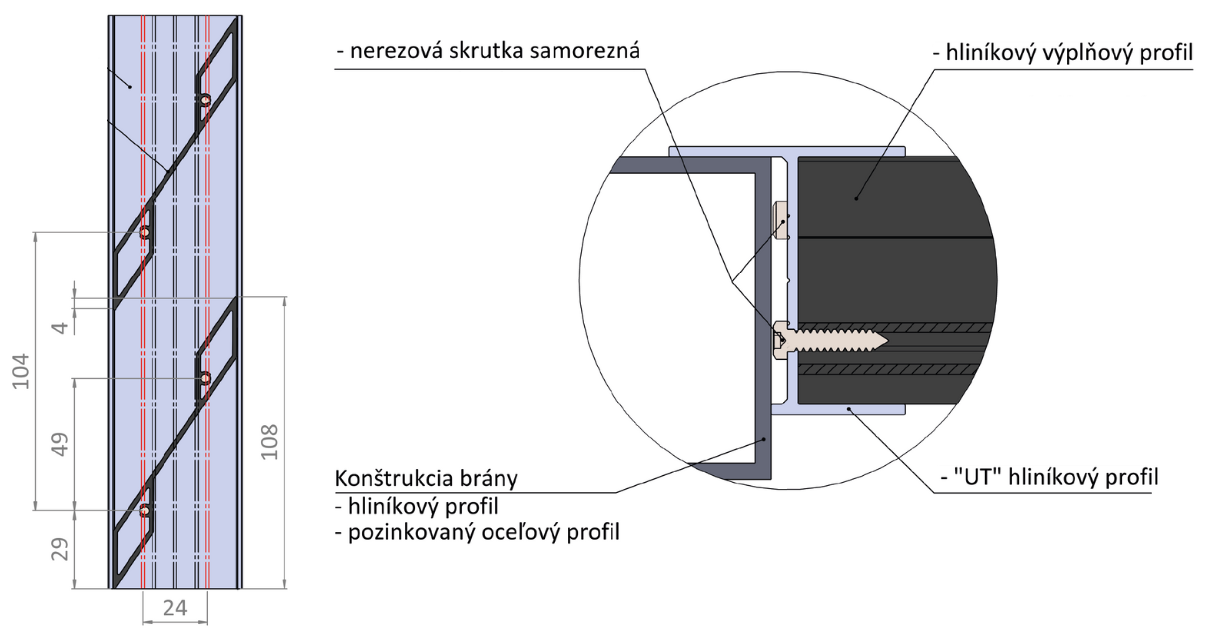
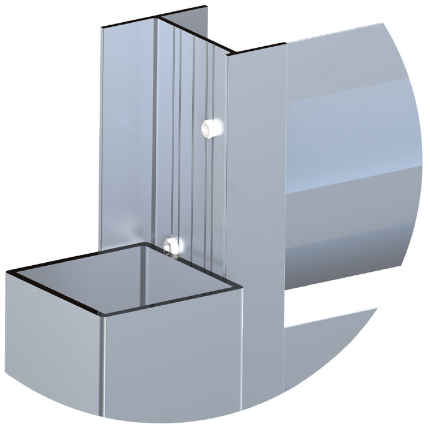
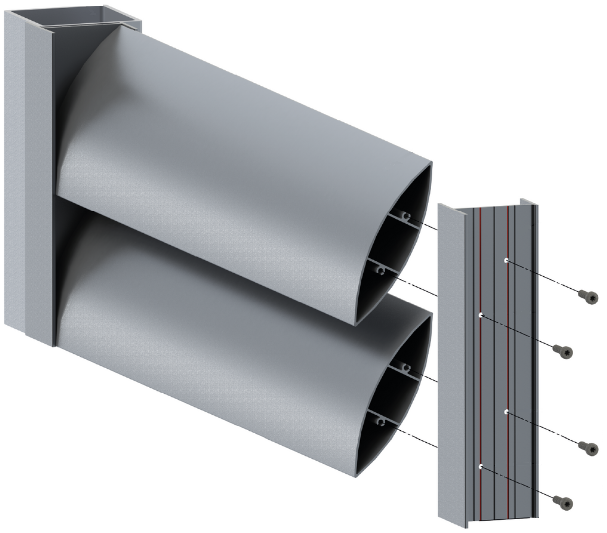
How to install an aluminium louvre slat:
There are 5 grooves on the outside of the U-shaped mounting profile. When installing louvre slats, use the following grooves to pre-drill the screw holes: the grooves at the edges (they are 24 mm apart). Inside the hollow slat, guide grooves in the fold hold the screw in place. When the slats are installed at an angle, these guide grooves ensure that every slat has the same inclination, creating a regular pattern. Measure the spacing between the slats on the mounting profile to create the pattern you want—open or closed. With the slat positioned at an angle, the distance between its two inner guide grooves is 49 mm. The slat is 108 mm high when installed at an angle.
 |
 |
 |
 |
How to install a teardrop-shaped aluminium slat:
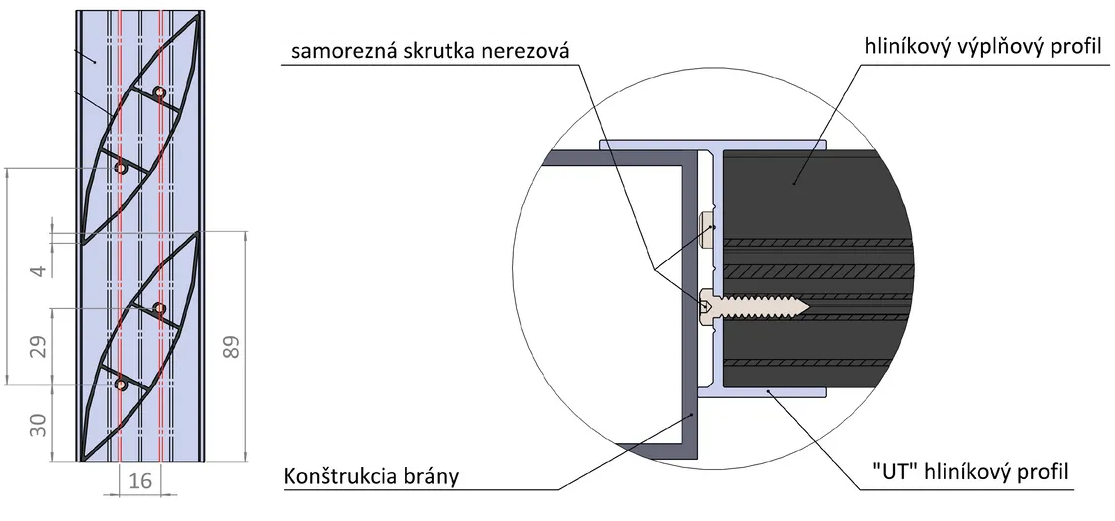
The U-shaped mounting profile has 5 pre-drilled grooves: one in the centre and two on each side of it. For a teardrop-shaped aluminium slat, use the two grooves next to the central one—the second groove in from the right edge and the second groove in from the left edge. They are 16 mm apart. Inside the hollow slat, guide grooves run down the centre and hold the screw in place. When the slats are installed at an angle, these guide grooves ensure that every slat has the same inclination, creating a regular pattern. Simply measure the spacing between the slats on the mounting profile to create the pattern you want—open or closed. With the slat positioned at an angle, the distance between its two inner guide grooves is 29 mm. The height of the slat installed at an angle in the mounting profile is 89 mm.
 |
 |
 |
 |
Finish
Aluminium is generally an excellent material, resistant to corrosion and weathering, with a long service life. The mounting profile is made from EN AW-6060 T66 aluminium and supplied with an anthracite RAL 7016 finish.
The profile is powder-coated. After application, the powder coating is cured in an oven. A matt thermosetting powder coating is used with Qualicoat certification, based on polyester resins, and designed for outdoor use..
This finish offers a long service life and resistance to UV radiation and yellowing.. It is intended for use in construction, where long-lasting colour and gloss are essential.
Please note
The manufacturing process requires that at the ends of profiles with a powder-coated finish, approximately 1 cm at each end of the profile is left bare to hold it during coating.. At the ends of the profile, there is a small hole, which you should take into account. The hole does not interfere with installation, but the end can easily be trimmed if necessary.
Technical specifications of the aluminium mounting profile for fence slats:
Material: natural aluminium (EN AW-6060 T66)
Finish: anthracite RAL 7016
Dimensions: 50 x 44 mm
Length: 2,000 mm, 3,000 mm, 6,000 mm
Weight: 1.22 kg, 1.83 kg, 3.66 kg
How can I order this item?
Choose the option that suits you:
- order online: use the buy button to add the goods to your shopping cart (you will find the buy button here in the product variants table).
- order by email: place your order at [email protected]